Hello Folks! This is my first How-To I though I'd Share. This is the basic workflow of the first zombie/corpse I've every tried to build. I used methods found here and around the web, but not any single one of them as I tried to combine the best aspects of all the methods I had seen. And as always, you follow this at your own risk! I'm not responsible for injury or death from following my steps, its for demonstration only. I hope you guys enjoy and find it helpful.
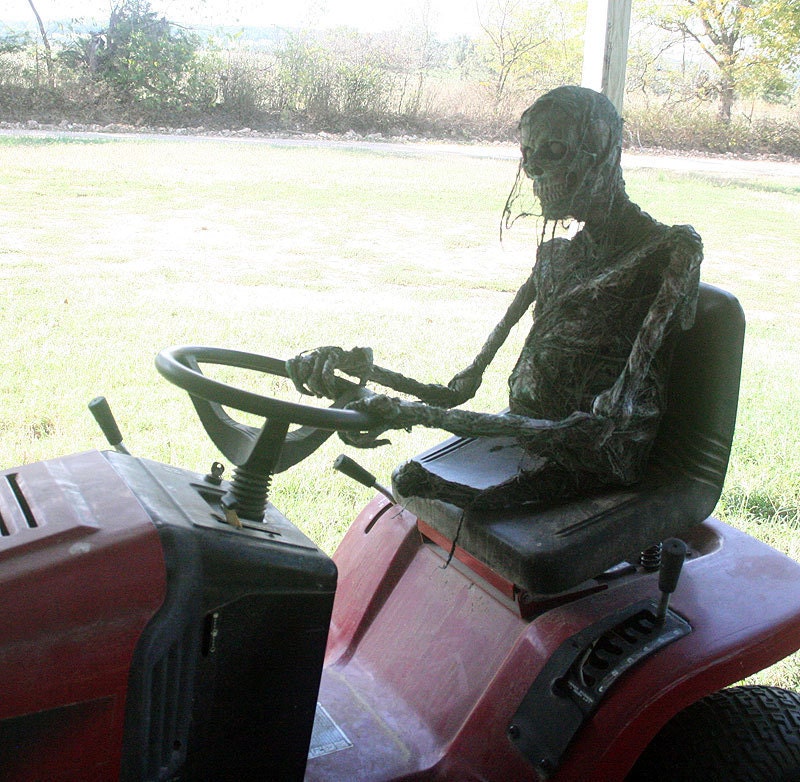
Ok, Then goal. What I wanted out of this was a corpse/zombie that could be posed mainly for use in photography (think Pumpkinrot's Freak Show Zombies from Last year) and a static Halloween prop second. I wanted to look creepy and realistic without being cheesy, have a good degree of movement for a static prop, and most important, be every cheap to make!
To begin, as I have done nothing of this sort before, I felt it wise to test the waters so to speak and start small. So I decided to start with a half corpse, being only torso, arms, and head. If that didn't fail epically, then I'd go for a full body corpse.
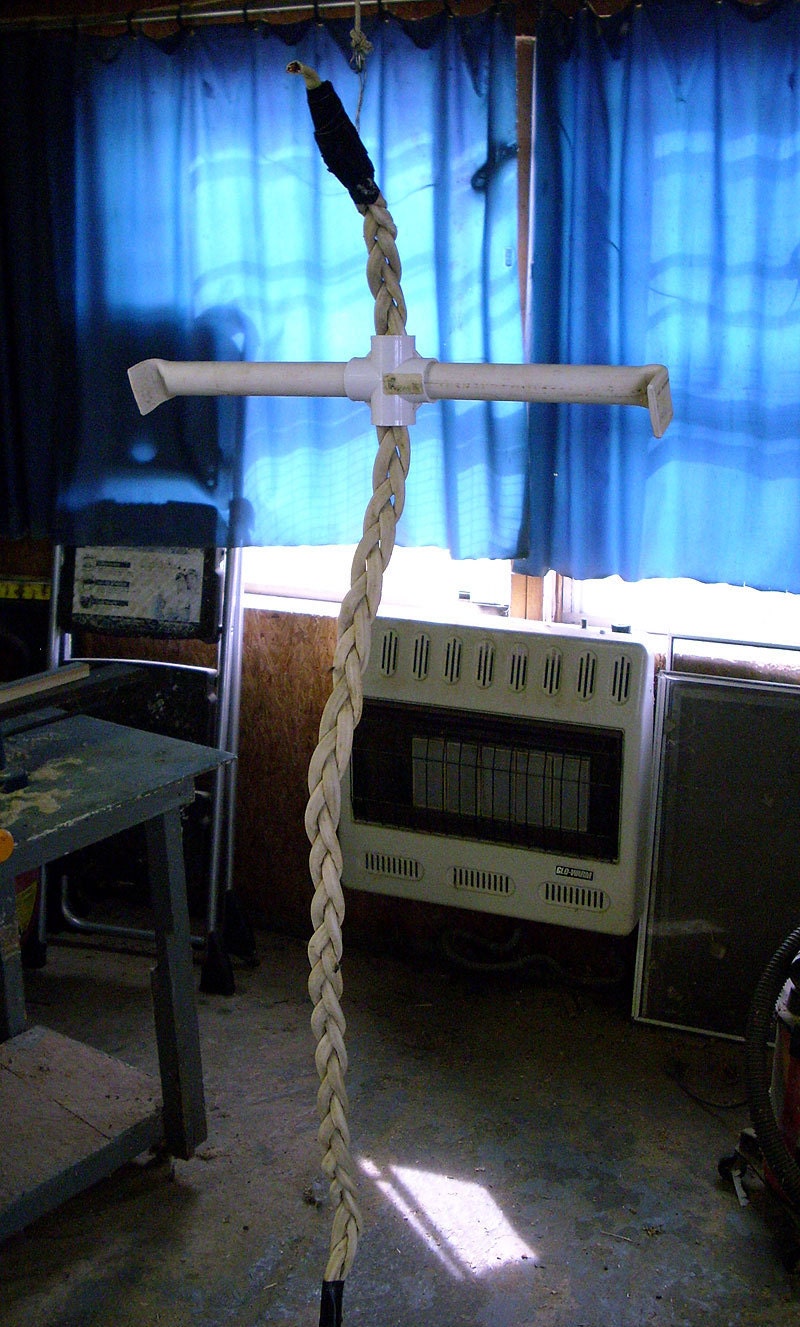
So lets get to it. I began with the spine. Since this guy is a crawler, and not needing to hold his weight, I went with a wire spine for flexibility. Having a much of scrap materials around, I used some second - hand 12/2 electrical wire. I cut three pieces about 3 feet long, taped the ends together, placed it in a vice, and braided the three together. I took this wire braid, and slipped a 3/4 inch pvc cross fitting over it to about to where the shoulders should be. I left enough for the neck to stick a skull on, always making things longer so it could be trimmed off if needed. I added two pieces of 3/4 pvc pipe for the shoulder-arm joints to the cross piece.
I used this method here at that point and have to say it works really well. I found however that I could simply heat the pipe with my heat gun in no time, makes no smoke/fumes, and can easily be shaped. No need for torches, heated rods, or any of that! Heat gun allowed me to make all the ends quickly and safely.
Next, the rib cage. Which I can tell you know after the fact was total overkill. IF I do this again, I'm not going to all the trouble, as you don't really see it in the final result. For the second zombie, I used a much similar method. That being said, this is what I did the first round.
I took a few close hangers (a buck or two from a dollar store) and cut them and straightened them. I laid them out on a table and arranged them into a frontal ribcage fashion. I duck taped them together where the sternum would be so I could keep everything in place as I picked it up and attached the floppy mess onto the spine. I bent the close hanger wires to shape and ran them through the braids of the spine to fasten.
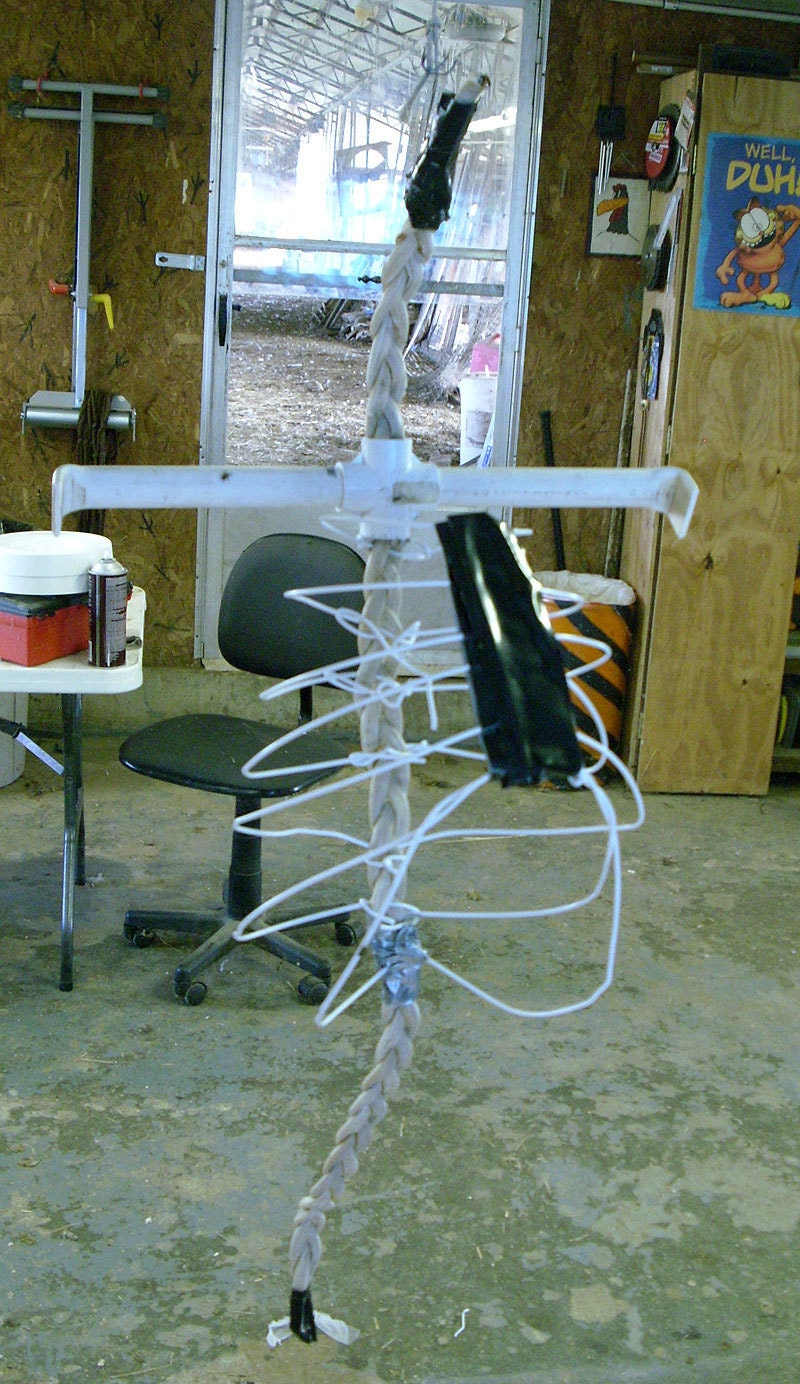
At this point i made the collar bones and scapula (shoulder blades). Collar bones are more 12/2 wire, and the scapula were pieces of 1 inch foam insulation board crudely cut to shape, then warped with the heat gun. These were then taped on with oh-so trusty duck tape.
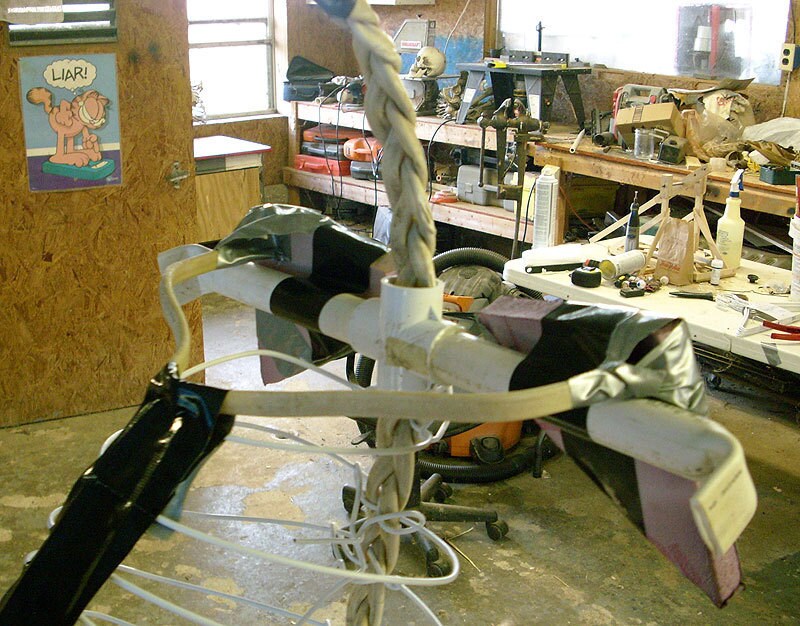
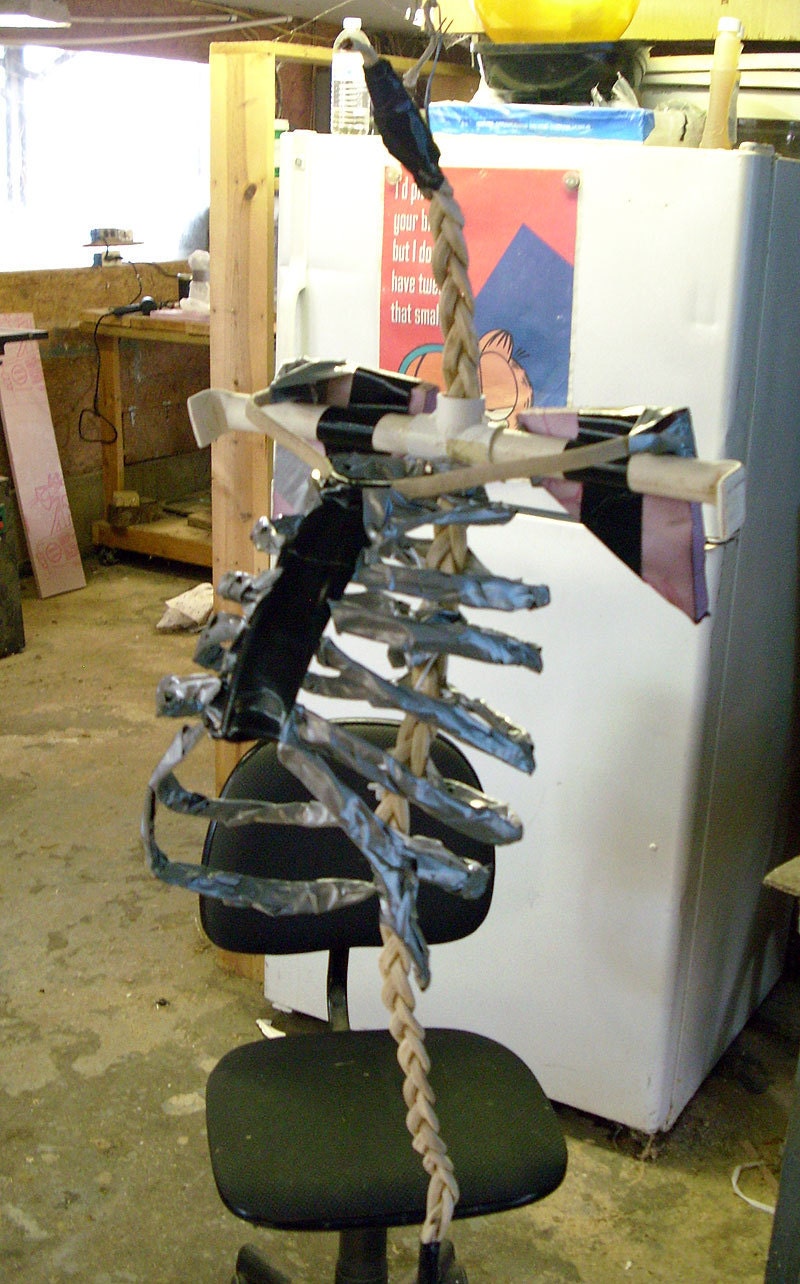
After that I crudely wrapped them all with cheap duck tape to give them volume. This took time and I wouldn't do this for a zombie again, but I think the results would be great for a scratch built skeleton where you'd see the effort.
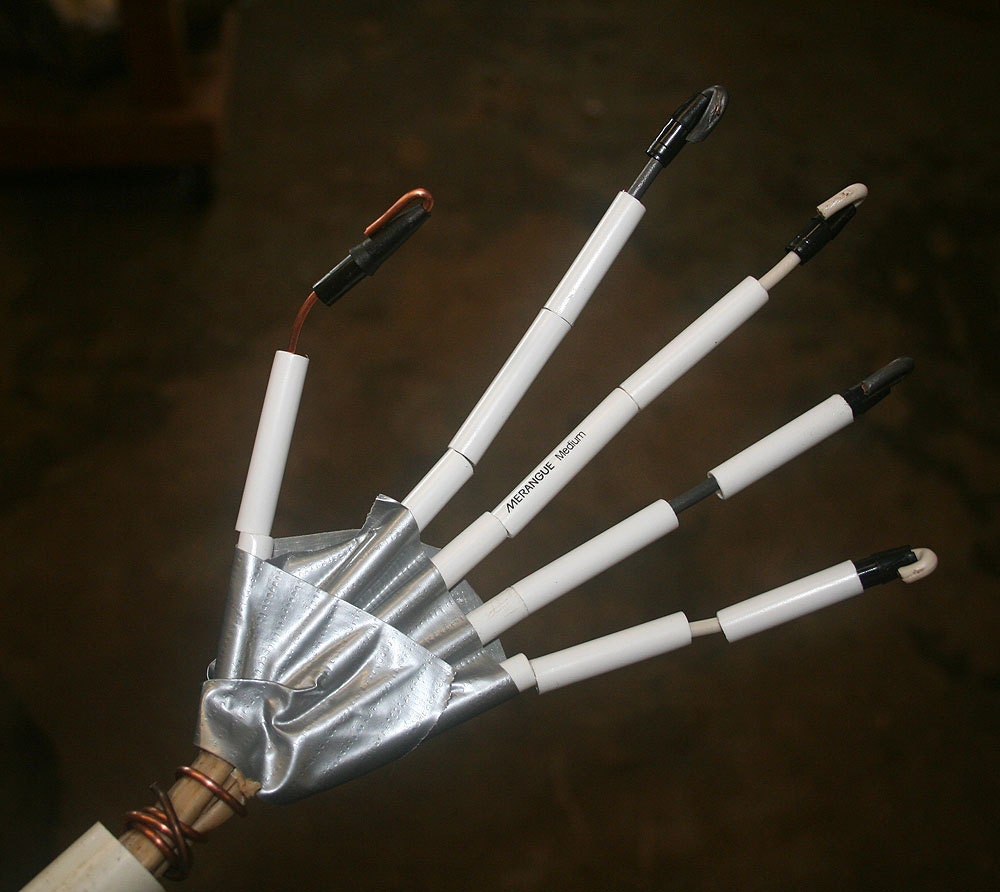
Next, the arms! and a slight departure from the 'Spawn of Articulation' method. I wanted my guy to have working hands. what I did here, was take another scrap of 12/2 wire, folded it over and twisted it together, and slipped 1/2 inch pvc over it.
I left a gap between the upper-lower arm for the bend of the elbow, and the separated out the wires for the fingers that stuck out the end. I can't stress enough, use extra wire at this point. If you get your finger wire too short you'll have a headache, so make it extra long.
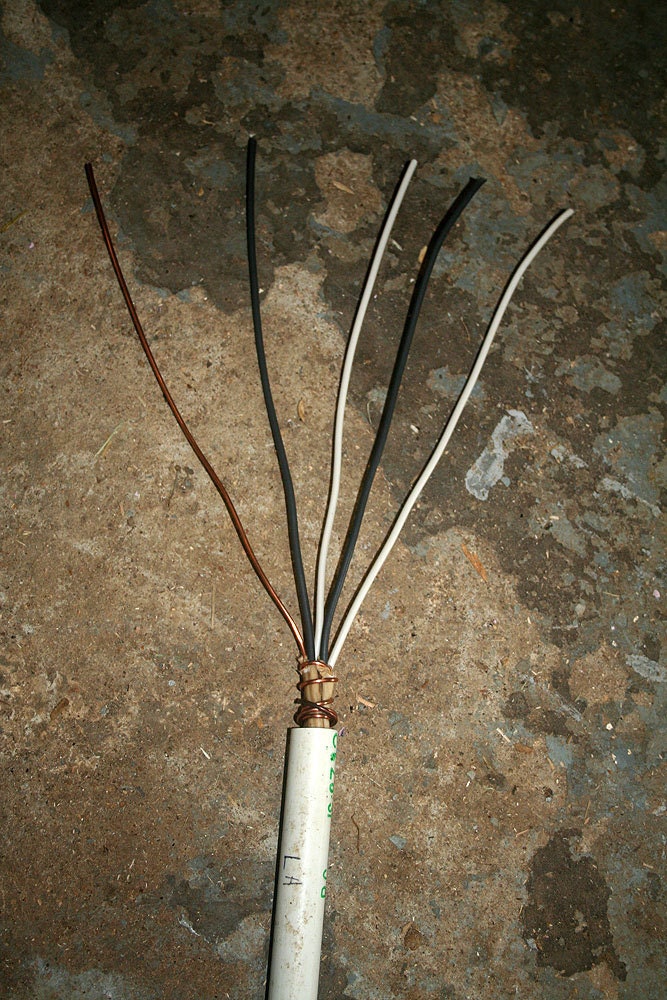
I found that depending on how tight your twisted your wire, the pvc pipe may or may not slip on the wire. to keep it in place, I heated the ends at the elbow with the heat gun, and crimped them with vice grips while hot. Make a nice tight grip on the wire.

At this point, I basically followed this method for creating the hands. I took cheap ink pens, and cut the tubes to size, slipped them over the wire and duck taped the whole mess together. See the link for more details.
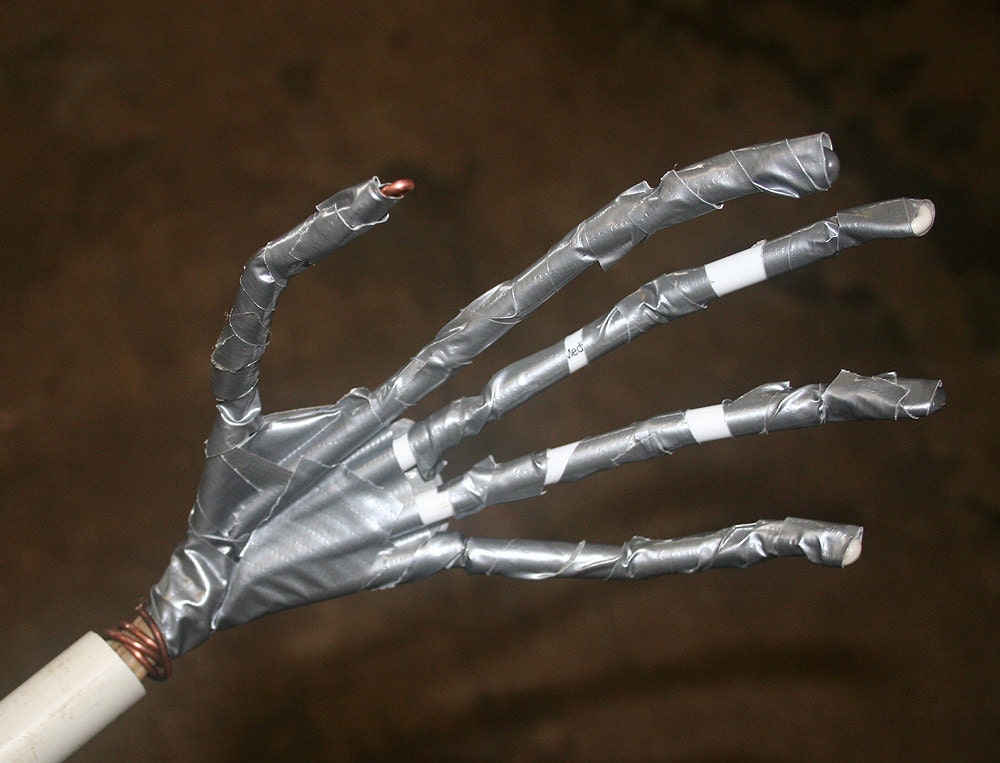
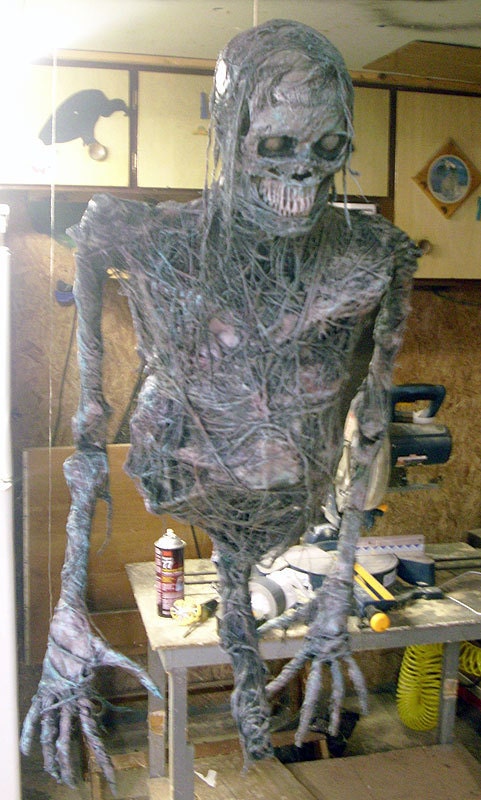
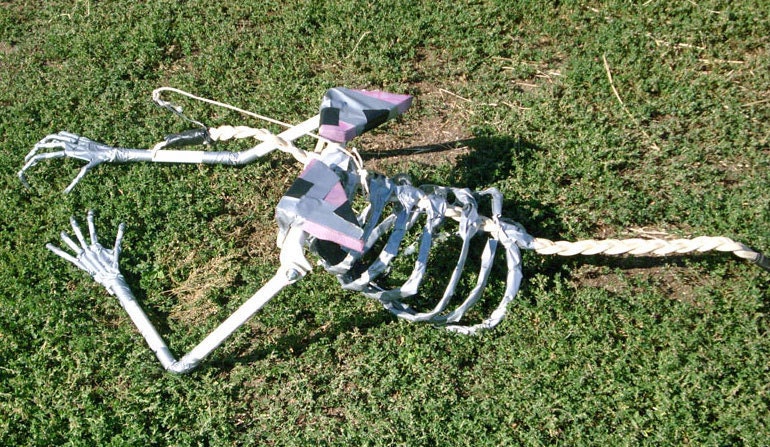
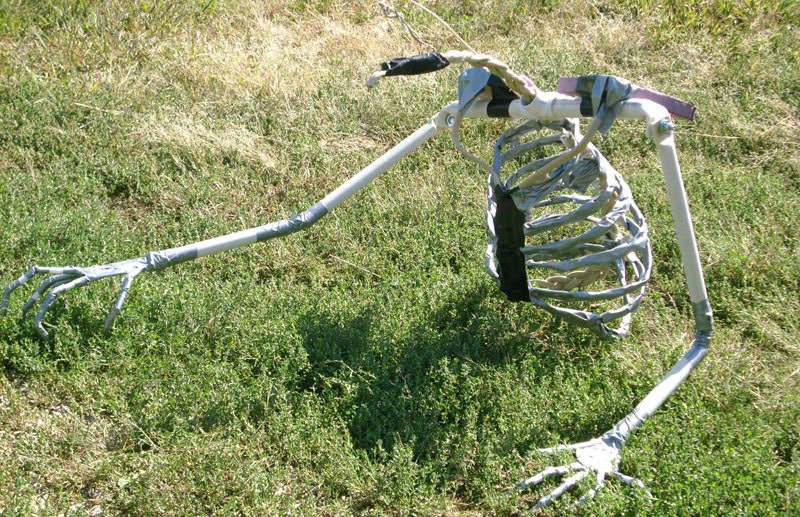
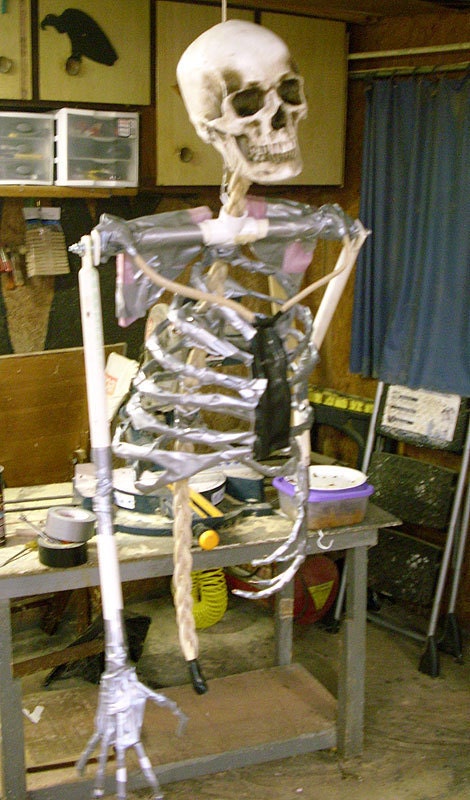
And here, giving the completed armature a test run, so far, so good. Next up corpsing!
First Up, the head. Got this skull at Walgreens for six bucks. I saw however that Big Lots has the same one, but for ten dollars or more. Anyhow, I bored a hole in the base and stuck it onto my wire neck. I just used extra plastic while corpsing to keep it firmly attached.
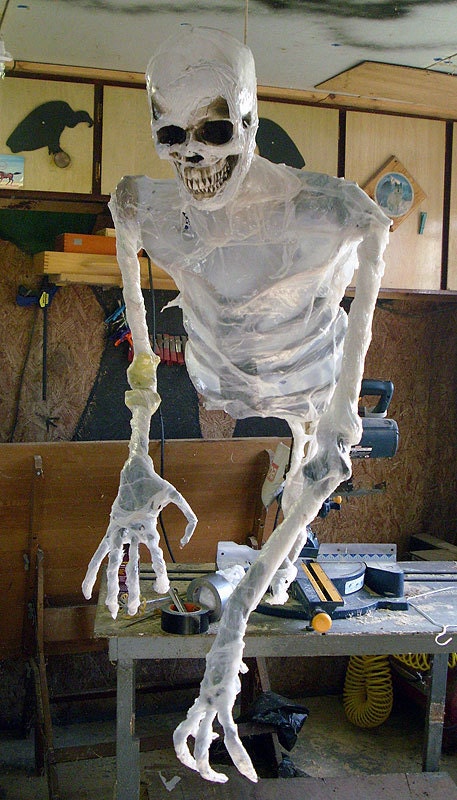
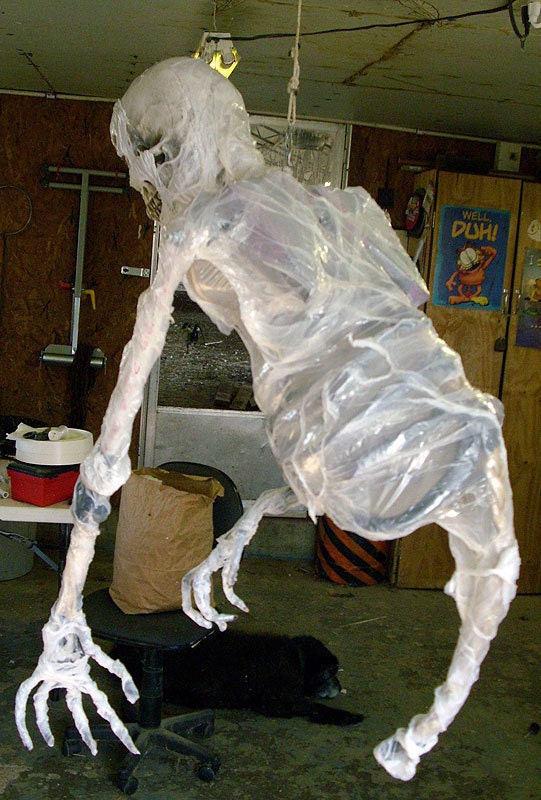
Alright, as far as corpsing goes, I went with the "Plastic Corpsing' method my Stiltbeast. All I can say is wow, fast, easy, cheap, no mess. I could have followed is method for painting/staining and been done here, but I wanted more of the Pumpkinrot zombie look, so after applying the plastic, I went into a different direction. For the eyes, I used the deodorant ball trick. Stuck them in with latex paint soaked cheesecloth.
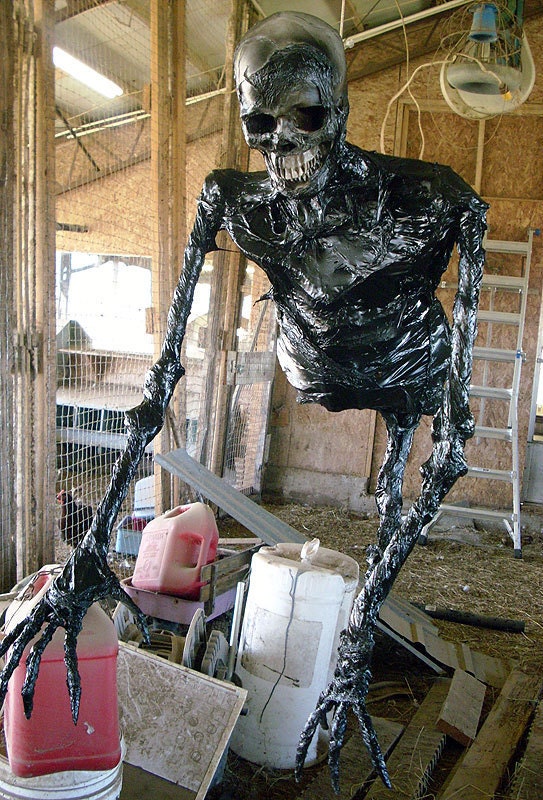
As I was going for a different look, the clear plastic had to go. Also, I found that it turned white in thicker areas. So i painted the whole thing black using spray paint for plastic surfaces. However, on the second zombie, I saved myself a lot of time and eliminated this step by corpsing with black garbage bags instead.
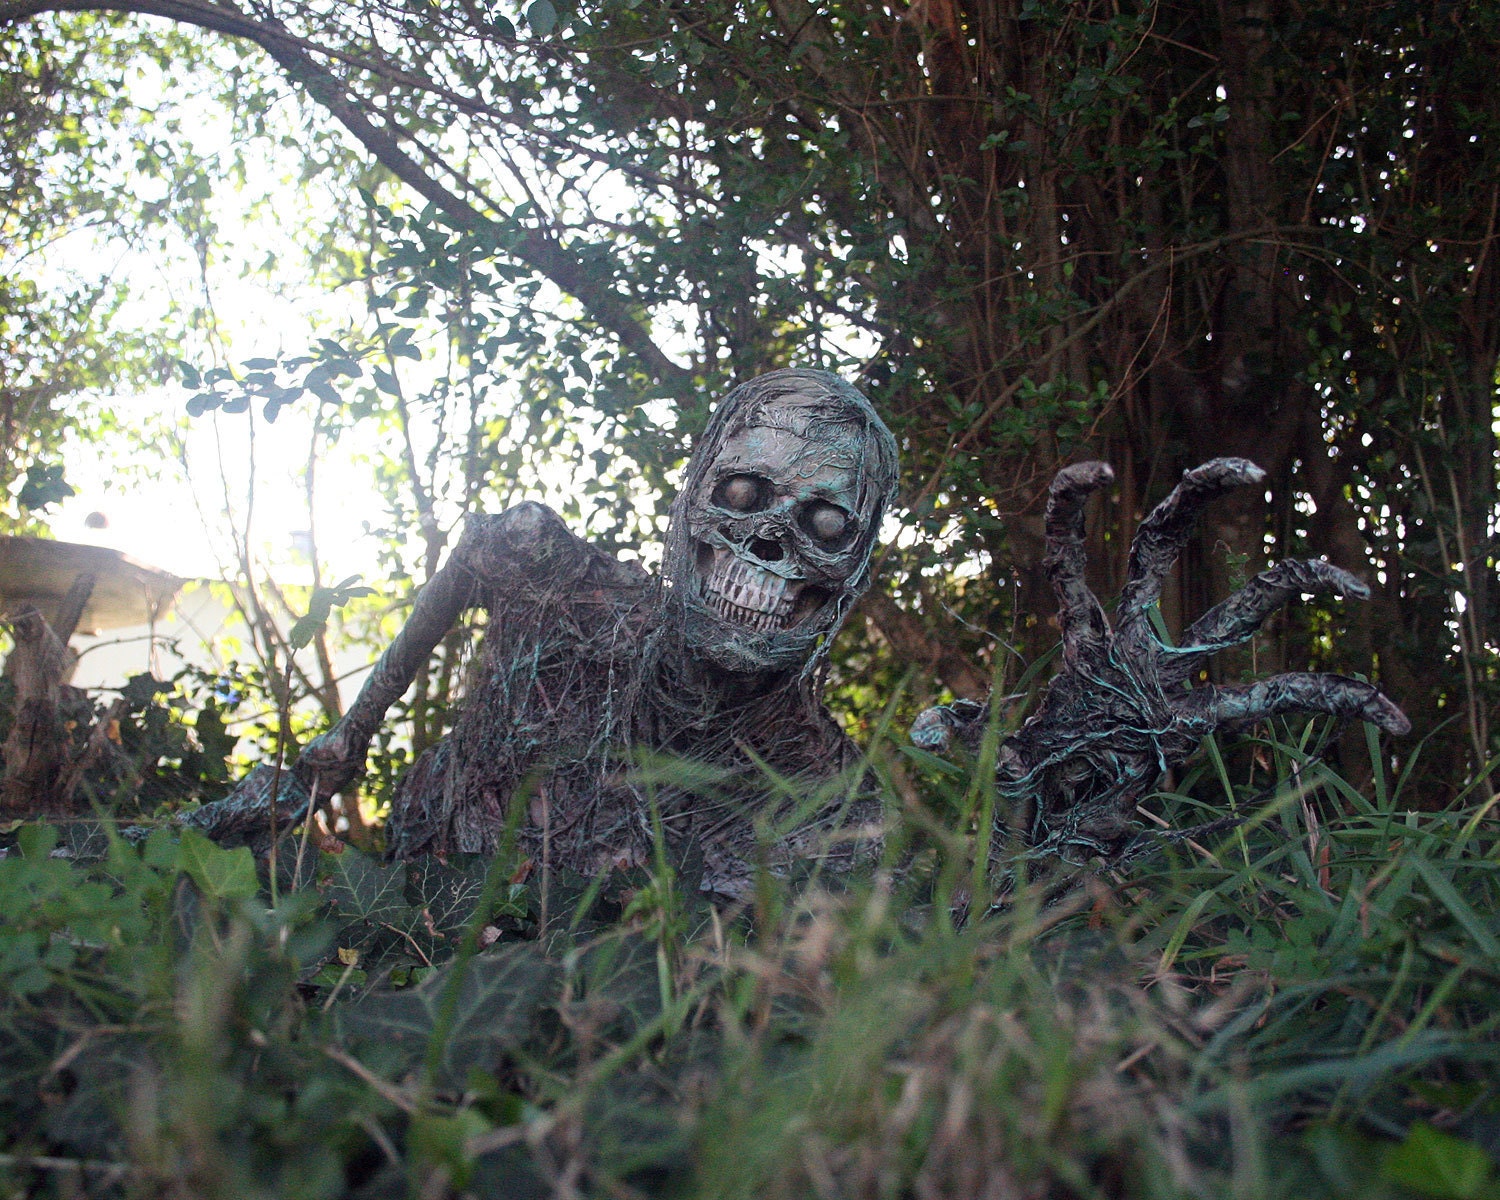
And next, came the messy part that brought it all together. With a mix of black latex house paint, and elmers glue about 50/50, I soaked cheesecloth, and Halloween spider webs, and stretched out and applied all over him in a gooey mess. Use this to make the effect of rotting hanging flesh, as well as nasty matted hair hanging in his face.
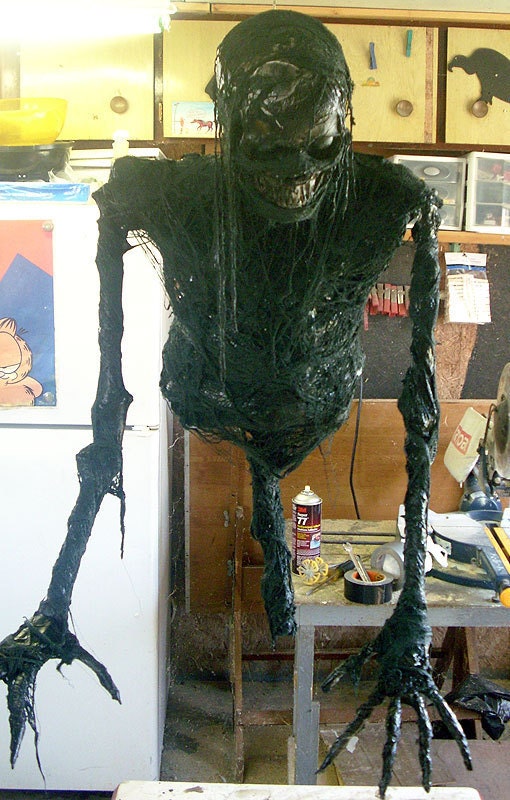
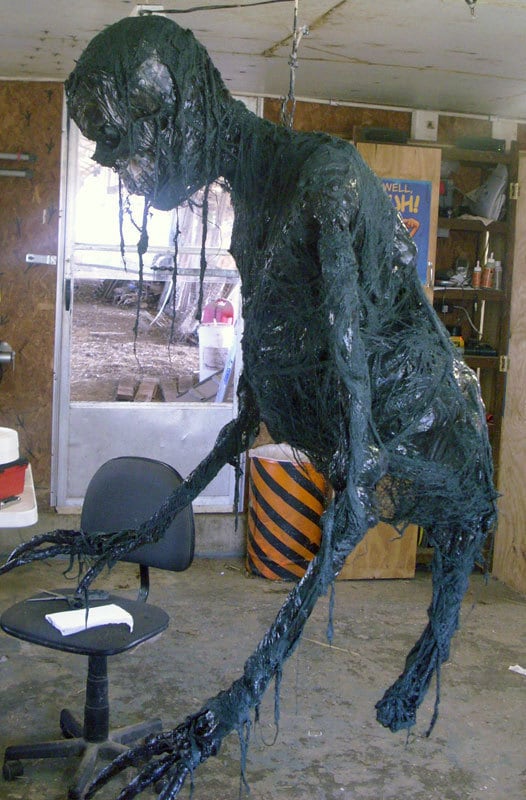
The final step was dry brush painting. Using cheap craft paints, I made up off tinted white colors of green, red, browns, and purple and brushed over him catching the high areas. I tried to do this unevenly to give it variety and detail. After that dried a bit, I gave it the slightest dry brush of pure white. After this he got a good heavy coat of gloss water based clear coat from my paint sprayer and I called him done. Here is some pics of him finished.